Tuesday, December 29, 2009

Sweet Potato Casserole

I had intended to post this one after Thanksgiving but I'm always putting things off. Now I'm typing this on a shiny new laptop so perhaps it will inspire me to blog more often. This recipe came from a church cookbook my mom bought years ago. Here's the original recipe...

Sweet Potato Casserole

3 c. mashed cooked sweet potatoes
1 c. sugar
1/2 tsp. salt
1/2 c. milk
2 eggs, beaten
1/2 stick margarine, melted
1 tsp. vanilla extract

Combine all ingredients. Put in a 7x12 inch casserole dish.

topping:
1 c. brown sugar
1c. nuts
1/2 c. flour
1/2 stick margerine

Put on top of the potatoes. Bake at 375 for about 30 minutes.
Top with mini marshmallows and put under the broiler until brown and melty. Keep a close eye on it, I think I remember my sister catching the marshmallows on fire when she got distracted.

I have made some changes to the recipe. My sister and I aren't big fans of nuts, but we like pecan pie, go figure! So my mom always made it with out nuts in the topping. The last few years we've been buying 20 lb. boxes of sweet potatoes. These sweet potatoes have been really sweet and buttery so I've been cutting back on the butter and sugar in the recipe. I also use about 4 c. of sweet potatoes. It would work fine to cut back on the topping as well if you're watching your sugar.

I actually made a larger one for Christmas because we had a couple of extra people and most of the people who come take some leftovers. 7 c. potatoes and one and a half times the amount of other ingredients and the original amount of topping. There were way more leftovers than I figured there would be. It turns out one of the people who came was allergic to sweet potatoes and I'm not sure if the other person had any or not. Next year I will not be doubling it.

Saturday, December 12, 2009

Ravioli Lasagna

Quick, easy and good! I used the frozen spinach which may have been a mistake as I actually had someone refuse to eat it it, no this someone was not a child even if they acted like it. "What's that icky green stuff? I'm not eating this." I personally didn't even taste the spinach except where it was clumped up in a few places. I would try this one again, without the spinach to accommodate my family.

I found this recipe over at Dinner With Julie.


Ravioli Lasagna

1 large jar good-quality tomato sauce
2 16-18 oz. bags fresh or frozen large ravioli – any kind
1 pkg. frozen chopped spinach, thawed
1 cup grated part-skim mozzarella (or as much as you like)
½ cup grated Parmesan

Preheat oven to 350°F.

Spray a 9”x13” baking dish with nonstick spray, and spread about a third of the tomato sauce over the bottom. Lay half the ravioli in a single layer overtop. Sprinkle with the spinach and half the cheese, another third of the sauce and then the remaining ravioli, sauce and cheese. Cover with foil and bake for 20 minutes, then uncover and bake another 10 minutes, until golden and bubbly.

Serves 6.

Wednesday, December 9, 2009

Buttermilk Cornbread

I completely forgot to take pictures of this but since I wasn't crazy about it I'm not gonna worry.

We had some buttermilk in the fridge so I decided to try out a new recipe for cornbread. The recipe came from this blog. It was moist but it was way too sweet. The crust was also a little soggy and tough. The only changes I made was to half it and I cooked it in a cast iron skillet. I wouldn't make it again.

Wednesday, December 2, 2009

Beth's Melt in Your Mouth Barbecue Ribs (Oven)

This amazing rib recipe came from recipezaar. I had a package of smithfield spareribs in the freezer and they turned out fantastic. They were incredibly tender and the sweet dry rub was so good no one even wanted any barbeque sauce. A note on the recipe suggested when pulling the membrane off the ribs to grasp it with a paper towel and pull which is a handy tip to try. I used the liquid smoke brushed on the ribs instead of the hickory salt, which I couldn't find. The poster also suggests trying the rub on chicken but I haven't tried that yet.

I repeat... these ribs were fantastic! You must try them.


Beth's Melt in Your Mouth Barbecue Ribs (Oven)


4 lbs pork ribs
3/4 cup light brown sugar
1 teaspoon hickory smoke salt
1 tablespoon paprika
1 tablespoon garlic powder
1/2 teaspoon ground red pepper (optional)
2 cups of your favorite barbecue sauce

  1. Preheat oven to 300 degrees f.
  2. Peel off tough membrane that covers the bony side of the ribs.
  3. Mix together the sugar and spices to make the rub.
  4. Apply rub to ribs on all sides. If you don't have hickory salt brush ribs with liquid smoke.
  5. Lay ribs on two layers of foil, shiny side out and meaty side down.
  6. Lay two layers of foil on top of ribs and roll and crimp edges tightly, edges facing up to seal.
  7. Place on baking sheet and bake for 2-2 1/2 hours or until meat is starting to shrink away from the ends of the bone.
  8. Remove from oven.
  9. Heat broiler.
  10. Cut ribs into serving sized portions of 2 or 3 ribs.
  11. Arrange on broiler pan, bony side up.
  12. Brush on sauce.
  13. Broil for 1 or 2 minutes until sauce is cooked on and bubbly.
  14. Turn ribs over.
  15. Repeat on other side.
  16. Alternately, you can grill the ribs on your grill to cook on the sauce.

Tuesday, December 1, 2009

Smothered Pork Chops, Turnip Greens and Cornbread

Tonight's dinner was way more trouble than it was worth, especially the turnip greens. My father had planted some turnip greens which needed to be harvested, so I went out and picked them and pulled the tough stems off and washed them several times to get all the dirt and bugs off. I cooked them using this recipe, no one really like it, not that it was bad, but I think we all prefer canned.

.


I found the recipe for the pork chops over at The Given's Chronicles. They were kind of tough and I didn't think they had a lot of flavor and I wouldn't make them again.

The cornbread was an old recipe I've made numerous times before. I found it in a Taste of Home magazine. The only problem I've ever had with it is that the top never browns, but nothing does in our oven. BTW, it's a sweeter cornbread so if that's not what you like you might want to look for something else.

Corn Bread Squares

1 c. all purpose flour
1 c. yellow corn meal
1/4 c. sugar
2 tsp. baking powder
3/4 tsp. salt
2 eggs, beaten
1 c. milk
1/4 c. vegetable oil

Preheat oven to 400 degrees. In a medium bowl, combine flour, cornmeal, sugar, baking powder and salt. Add eggs, milk and oil. Beat just until moistened. Spoon in a greased 8" square pan. (I've also used a cast iron skillet) Bake for 20 - 25 minutes.

Sunday, November 29, 2009

Buttermilk pancakes

I'm not that great of a pancake maker (they tend to fall when I flip them) and I grew up on Bisquick pancakes not from scratch. I found this recipe at A bountiful kitchen it turned out okay. Probably worth trying if you don't suck as bad as I do at making pancakes. Click the link for the recipe and give it a try.


Saturday, November 21, 2009

Laurie's Amazing Carrot Cake

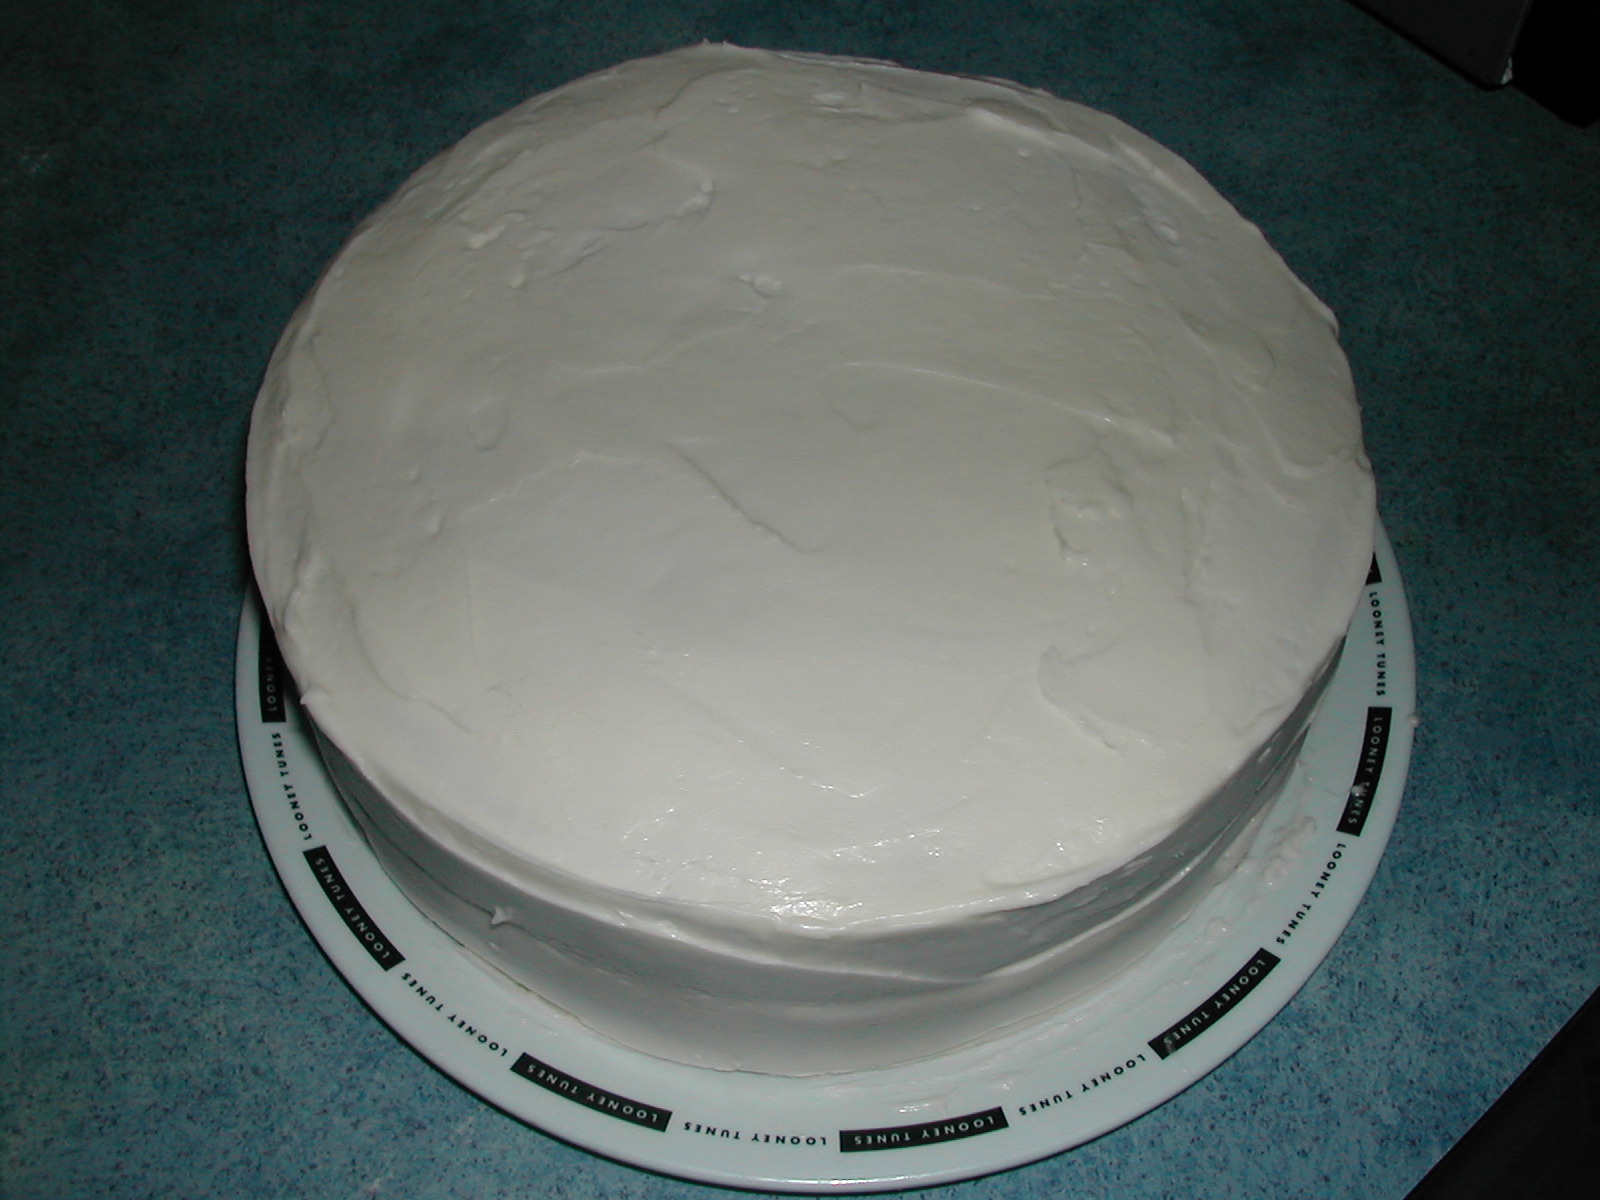
This cake turned out pretty well. I halved the cake recipe to make 2 9-in layers. Freezing made it easy to frost. I goofed and halved the frosting as well, I don't know if it was just a really good frosting recipe or if it was because I made less of it so it wasn't overwhelming but I loved the frosting.

I wasn't crazy about the ground nuts and raisins, I like whole raisins and I thought the ground nuts left a bitter taste in some bites. (maybe I should have toasted them?) I would try it again with a few changes.

Edit: I was looking at the frosting recipe again and realized I don't know what I thought a cube of butter meant, a stick or a couple of tablespoons? I also can't remember whether I used vanilla or lemon juice. I normally used vanilla but I liked this one better than normal so maybe I used the lemon juice?


Frosted very neatly.


Last piece... I kept forgetting to take pictures.

Laurie's Amazing Carrot Cake

3 1/2 cups sugar
1 cup oil
1 1/2 cups buttermilk
8 eggs
1 Tablespoons salt
4 teaspoons soda
4 teaspoons cinnamon
1 1/2 teaspoons cloves, ground
6 cups grated carrots
2 cups chopped pecans
4 1/2 cups flour
2 cups raisins and / or 2 cups chopped fresh cranberries

Prepare pans:
2- 10 inch Spring form pans,
or
two- 9 inch round cake pans and two- 8 inch round cake pans.

Beat the eggs, oil and buttermilk together in a large bowl. Grind the pecans and raisins in a food processor with a metal blade. Pulse until chopped into very small pieces. Add all of the dry ingredients, including the nuts and raisins to the wet ingredients. Mix until all ingredients are incorporated. Pour into greased and floured pans, lined with parchment or wax paper. Only fill pans 3/4 full. Bake at 325 degrees for about 1 hour if using 10 inch Spring form pans, about 45 minutes for round pans. Test with toothpick to see if done before removing from oven. After removing from oven, wrap each layer individually with saran wrap and place in freezer while still warm. Remove after cake is cooled and frozen, and apply one layer of frosting. Layer the cake on a platter. Return to freezer. Let cake refreeze until frosting is firm. Remove and frost outer sides and top of cake again. At this point you can either place back in freezer until ready to use, or let sit out to thaw. If making the cake in advance, cover when frosting is hardened and store in freezer. On day of serving, remove cake from freezer at least three hours before serving. You may decorate with lemon leaves around base of cake.

Cream Cheese Frosting:
1 cube butter, not margarine
8 oz. cream cheese
1 teaspoon vanilla (I used 2 teaspoons fresh lemon juice instead)
pinch salt
about 6 cups powdered sugar
cream or milk to thin, about 3 tablespoons

Cream the butter and cream cheese. Add flavoring, salt and about 3 cups of powdered sugar. Mix well. Add rest of powdered sugar and milk or cream to desired consistency. Frost as directed. If you are making 4 layers, I 1/2 this recipe again so you will have enough to frost all four cakes. If making either 2 -10 inch spring form cakes, or just frosting 2- 9 inch cakes, and keeping the smaller 8 inch cakes in the freezer for later use, one batch of frosting is enough.

Thursday, November 19, 2009

Dolly Parton’s Green Tomato Cake

I made this cake a few months ago. I was looking for something to do with a bunch of green tomatoes that had fallen off a potted tomato that the wind had blown over and found this on recipezaar. It was adapted from a recipe from Dolly’s Dixie Fixin’s. I ran out of butter so I didn't make the cream cheese frosting, maybe It would have been better if I had. It was okay but no one felt it was worth making again.


Dolly Parton’s Green Tomato Cake

1 cup raisins
Hot water
3 cups all-purpose flour
1 teaspoon salt
1 teaspoon baking powder
1 teaspoon ground cinnamon
1/2 teaspoon ground nutmeg
2 1/4 cups granulated sugar
1 cup butter, melted
3 eggs
2 teaspoons vanilla extract
1 cup chopped walnuts
1 1/4 lbs green tomatoes, cored, seeded, and diced small
1 cup unsweetened flaked coconut

Cream Cheese Frosting

1 lb chilled cream cheese (two 8-oz packages)

8 tablespoons butter, at room temperature

1 tablespoon vanilla extract

4 cups powdered sugar, sifted
1 pinch ground cinnamon, to taste

Directions

  1. Preheat oven to 350 degrees F. Butter two 9-inch cake pans and lightly dust them with flour.
  2. Place the raisins in a bowl and add hot water to cover; set aside. (Note from Julesong: you can use warm rum or other liquor, if you like.).
  3. Sift the flour into a medium bowl, then add the salt, baking powder, cinnamon, and nutmeg; stir to combine.
  4. In another large bowl, whisk together the sugar, melted butter, eggs, and vanilla. Gradually add the flour mixture, stirring, until a smooth batter forms.
  5. Drain the raisins in a sieve.
  6. Stir the walnuts, drained raisins, cored/diced tomatoes, and coconut flakes into the batter.
  7. Pour an equal amount of batter into each prepared cake pan and spread evenly with a spatula.
  8. Bake in preheated 350 degree F oven for about 60 minutes of until a toothpick inserted into center comes out clean. When done, remove from oven and let cake cool in pans on wire racks.
  9. When cake is cool to the touch, slide a knife or icing spatula around the inside rim of each pan to loosen edges and carefully flip the cake layers onto the wire racks to continue cooling. (You can use an inverted plate on top of the pan, flip, and carefully transfer to racks, if you like.).
  10. If you want to frost the cake, make the cream cheese frosting while layers are cooling.
  11. To make the frosting, in a medium bowl beat together the cream cheese and butter with an electric or hand mixer until well blended.
  12. Add the vanilla and beat until incorporated.
  13. Gradually add the powdered sugar while continuing to beat until smooth.
  14. Beat in cinnamon until incorporated. Use to frost the cake.
  15. To frost cake: when cake is completely cooled place one layer on serving plate and, using a spatula, frost all over with half the frosting. Place second layer on top. Frost second layer with remaining frosting.

Tuesday, October 27, 2009

Chocolate Truffle Cookies

I've had this recipe for a couple of years and unfortunately I can't remember where I found it.I've made them a few times and they've been great but the last time I made them I used butter instead of margarine and I don't think they turned out as well. They seemed a little greasy and they also seemed to spread a bit more.


Chocolate Truffle Cookies

1 1/4 c. butter or margarine, softened
2 1/4 c. confectioner's sugar
1/3 c. baking cocoa
1/4 c. sour cream
1 tbs. vanilla extract
2 1/4 c. all purpose flour
2 c. (12 oz) semisweet chocolate chips
1/4 c. chocolate sprinkles

Preheat oven to 325 degrees.

In a mixing bowl, cream together butter, sugar and cocoa until light and fluffy. Beat in sour cream and vanilla. Add flour and mix well. Stir in chocolate chips. Refrigerate for 1 hr.

Roll into 1 inch balls and dip in chocolate sprinkles. Place sprinkled side up, 2 inches apart on ungreased baking sheets. Bake for 10 min or until set. Cool 5 minutes before removing to a wire rack to cool completely.

Yield: 5 1/2 dozen

Sunday, October 25, 2009

Pizza!

I love pizza and this is one my favorite crusts. I found the recipe at allrecipes and tried it based on the tons of great reviews (1,862 right now). It makes one huge pizza and makes a pretty thick crust. It's been my go to crust for awhile. If you're looking for a pizza crust you should definitely give this one a try!


Jay's Signature Pizza Crust

2 1/4 teaspoons active dry yeast
1/2 teaspoon brown sugar
1 1/2 cups warm water (110 degrees F/45 degrees C)
1 teaspoon salt
2 tablespoons olive oil
3 1/3 cups all-purpose flour

In a large bowl, dissolve the yeast and brown sugar in the water, and let sit for 10 minutes.


Stir the salt and oil into the yeast solution. Mix in 2 1/2 cups of the flour.


Turn dough out onto a clean, well floured surface, and knead in more flour until the dough is no longer sticky. Place the dough into a well oiled bowl, and cover with a cloth. Let the dough rise until double; this should take about 1 hour. Punch down the dough, and form a tight ball. Allow the dough to relax for a minute before rolling out. Use for your favorite pizza recipe.


Preheat oven to 425 degrees F (220 degrees C). If you are baking the dough on a pizza stone, you may place your toppings on the dough, and bake immediately. If you are baking your pizza in a pan, lightly oil the pan, and let the dough rise for 15 or 20 minutes before topping and baking it.


Bake pizza in preheated oven, until the cheese and crust are golden brown, about 15 to 20 minutes.

Saturday, October 24, 2009

Chocolate Cake

This recipe came from Food Hunter's Guide to Cuisine. It's a nice chocolate cake, excellent texture and very moist. I personally thought the taste of the sour cream in the cake came through a bit more than I would have liked (it could have been my imagination, I'm not a huge fan of sour cream) I didn't use cherry preserves as a filling, other than that I followed the recipe.


I had picture of the whole cake but they turned out really blurry. My picture taking skills have sucked lately. I also have no dishes that are worthy of being photographed which is why the cake is sitting on a Winnie the Pooh plate.

The time on the recipes seems likely to be for a sheet cake. I think 20-25 min. seems more likely for a layer cake but I forgot to write down how long I cooked it for ( I made it a few weeks ago and now I can't remember)

The recipe is copied below as written on Food Hunter's blog

Chocolate Cake
(old family recipe)

1 cup cold water
1 stick butter
1/2 cup cocoa
2 cups sugar
1 3/4 cups flour
1 tsp baking soda
1 tsp salt
3 eggs
3/4 cup sour cream

1. Heat oven to 350°F. Grease and flour your pan.
2. Stir together flour, cocoa, baking soda and salt in large bowl.
3. Cream butter and sugar in a mixing bowl at medium speed. Add eggs one at a time mixing after each addition. Add sour cream beat well. Alternate between dry ingredients and water mixing just until combined. Pour batter into prepared pans.
4. Bake 50-60 minutes or until wooden pick inserted in center comes out clean. Cool 10 minutes; remove from pans to wire racks. Cool completely.

One Bowl Butter Cream Frosting
(Phylis's famous frosting)

6 Tablespoons butter, softened
1/2 cup Cocoa
2 2/3 cup confectioners sugar
1/3 cup milk
1 teaspoon vanilla

In a small bowl, cream butter. Add cocoa and confectioners sugar alternately with milk; beat to spreading consistency. (additional milk may be needed) blend in vanilla.

Filling

1 small jar cherry preserves

Friday, October 23, 2009

Banana cupcakes with honey cinnamon frosting

I found this recipe at Good Things Catered. I didn't love the recipe enough to make again so i won't bother putting it up here, you can find it and a ton of other great looking recipes at her blog.

The cupcake had more of a muffin texture which is, I believe part of the reason I wasn't crazy about the recipe. I love a banana muffin but not with frosting, especially when my mouth was set for cupcakes. The frosting was okay but everyone thought it tasted like plain vanilla.

Sunday, October 18, 2009

Sweet Potato Fries

I've always been a fan of sweet potatoes, they're full of nutrients and low in calories and they actually do taste sweet. How can you go wrong with a vegetable like that?

I saw this recipe for Oven Baked Sweet Potato Fries at The Givens Chronicles and knew I would have to try it. It was mostly liked except some people wanted it to be crispy. I've actually made it three times in the past month. I've tried cooking on a baking sheet at 450 to get it crispier and just last night I tried it on my pizza stone at 450 but it seems these just aren't going to get the crunch that was desired by some. Personally I loved them the first time I made them. They tasted like a roasted sweet potato but the cinnamon brought out the sweetness and the cayenne pepper gave it a little kick. I will be making these often even if I have to eat them all myself!


Here's a copy of the recipe

1-1.5 lb sweet potatoes, peeled and cut into ½” wide strips
1/4 cup olive oil
1/2 tsp salt
1/2 tsp cinnamon
1/4 tsp red pepper (optional)

Preheat oven to 425°. Line baking sheet with aluminum foil.
Place potatoes in gallon Ziploc bag and add all and seasonings. Seal and shake making sure they are all coated.
Spread onto baking sheet in single layer and not crowded.
Cook 30 minutes, turning every 10 minutes. Transfer to paper towel lined plate.
Note. They will not be crispy like regular French fries. Try not to overcrowd them or cook something else in the oven with them. They need room to breathe.

Monday, September 28, 2009

Sesame Broccoli & frozen sweet & sour chicken

I wanted to try a bag of Wanchai Ferry sweet & sour chicken that was in the freezer (btw it was okay but I'd much rather have it from a restaurant). To go with it, I had some broccoli that needed to be eaten and thought that Sesame Broccoli sounded like it would go well with the meal. It was alright but not spectacular. I don't think I would make it again.

No picture but here's the link

Thursday, September 17, 2009

Pineapple Casserole

You might have seen this over at Danielle's blog Cooking for My peace of mind. I needed to use up some ritz crackers and was thinking of getting my sister's recipe when I saw her post. I think her's was actually better. Sorry sis! I think it was the crushed pineapple that made it. It gave it a smoother texture. Next time I might halve it, I had two servings and someone else had three but there was still over half a casserole left. I'll also try it with just crushed pineapple and see how that works.

This a is really simple and delicious recipe. It's served as a side dish but it's also like dessert. It's kind of like sweet potato casserole that way. Btw, I usually make sweet potato casserole for Thanksgiving and Christmas so that recipe should come up in a couple of months.


If the cheese doesn't look melty it's because I took the picture the next day and hadn't been reheated yet.

Pineapple Casserole

1 20 oz can of pineapple chunks, drained
1 20 oz can of crushed pineapple, drained
5 tablespoons flour
1 cup sugar
1 1/2 to 2 cups of sharp cheddar cheese, shredded
1 1/2 cups ritz cracker crumbs
1 stick (1/2 cup) butter, melted

Preheat your oven to 350.
Grease a small casserole dish (about 11 x 7).
Combine the pineapple, sugar, flour and cheese in a large bowl.
Pour into the casserole dish.
Top with cracker crumbs and drizzle the melted butter over the top.
Bake for about 30 minutes.

Wednesday, September 16, 2009

Baking Powder Biscuits

I came across a recipe at Running Foodie's blog for baking powder biscuits and her photo looked so good I had to try them for myself. She called hers "Everest biscuits" unfortunately mine didn't rise quite so high but they were still really good! You should check out her picture it's much more appealing than mine.


leftover biscuits (it made about 16 2 1/2 in. biscuits)


breakfast the next morning


Apple butter my parents brought back when they went to Sevierville, TN. last week.
There's a store and restaurant up there that is great. I was up there in 2001 and it was the first time I'd ever had apple butter I liked. I hate the stuff from the grocery store.

Here's a copy of her recipe

Rumford Baking Powder Biscuits aka Everest Biscuits

4 cups sifted all-purpose flour
2 tablespoons baking powder
1 1/2 teaspoons salt
1 tablespoon sugar
2/3 cup shortening (I use Smart Balance)
1 1/3 cup milk
(you might need a little more milk to make it cohesive enough to shape)

  1. Heat oven to 425˚. If you have cast iron skillets, put about a tablespoon of shortening each in 3 10-inch skillets and place in the oven to heat while preparing the dough. I use a 10 1/2-inch, an 8 1/2-inch, and a 6-inch skillet because that's what I have. If you don't have any cast iron skillets, grease a large cookie sheet and set aside. Or, use the cast iron skillet and a cookie sheet if you haven't enough skillets.
  2. Sift flour, baking powder, salt, and sugar together. Cut in shortening until mixture is like coarse corn meal (if some pea-size chunks remain, that's okay). Add milk, stirring it in quickly with a fork, to form a soft dough. (If a large portion of the dough is still crumbly and not dough-like, add a tablespoon or so more of milk.)
  3. Turn dough out onto lightly-floured surface; knead about 1/2 minute. Roll 1/2 inch thick, or slightly taller; cut with 2-inch cutter dipped in flour (I use both a 2-inch and a 1 1/2-inch cutter). Place fairly close together in the skillets or on the cookie sheet (not right next to each other, maybe between 1/4 and 1/2 inch; (ou can also brush the tops with melted butter if you like) bake about 12 minutes. Serve hot.
I used a cookie sheet instead of cast iron skillets. Maybe next time I'll halve the recipe and use my skillet. I also has something else in the oven so I had to open the door and check it which could be why mine didn't rise as high or I might have rolled them to thin I've never been good at judging measurements. I also had to turn the broiler on to brown the tops. I always have a problem with the tops whatever I'm baking not turning brown.

Tuesday, September 15, 2009

Foodie Blogroll

I just got approved for the foodie blogroll which has a fantastic collection of bloggers. I'm very pleased to be a member!

Sunday, September 6, 2009

Cranberry Orange Bars

I found the recipe at Good Things Catered and it was fantastic! Not every one in the family likes cranberries so I ate most of it myself but I did take some to my sister and her husband and she like them as well. I never got to find out her husbands opinion, she'd eaten them all without him even knowing they were in the house!

I didn't have any oranges so I used OJ from the carton and skipped the zest. I also used frozen cranberries.


Cranberry Orange
Bars

Ingredients:
1/2 c. butter, at room temperature
1 1/2 c. sugar
2 eggs, at room temperature
2 Tbsp fresh orange juice
1 tsp vanilla
1 1/2 c. flour
1 tsp baking powder
1 Tbsp orange zest
2 c. fresh cranberries

Directions:
-Preheat the oven to 350 degrees.
-Beat together sugar and butter until lighter in texture.
-Beat in eggs, orange juice and vanilla until combined
-Add flour and baking powder and mix well (should be the consistency of a cookie dough).
-Fold in orange zest and cranberries.
-With an oiled spatula, spread batter evenly in a 9x12 prepared baking pan.
-Bake for about 40 minutes.

Wednesday, September 2, 2009

S.O.S

No, I'm not sending out a distress call! SOS stands for sh*t on a shingle, the names unappetizing but it actually does taste really good. It's a military recipe that's been handed down from my great grandfather who learned to cook in the army. He was born in 1914 and I think he lied about his age and joined when he was 16 so he would have been in the army in 1930 but I'm not sure how long he served for.


I've seen several variation for this recipe but never exactly like this so I'm not sure if this is how they made it or if he changed it over the years but my mom watched him make it one day and wrote down exactly what he did and this is how we've been making it ever since.

SOS

Brown 1 lb. hamburger in a skillet. Drain grease. Add salt and pepper and half a stick of butter (or margarine). Add 2 glasses of water (the glass we use holds 2 cups of water so you'll use 4 c. total) . Cook on high heat and skim off foam. Let cook about 15 minutes. Put 3 tbs. of flour (it doesn't have to be a level spoonful and we've always used self-rising but I don't think it would matter) in a glass. Add almost a glass of hot water. Stir. Pour in a little at a time while stirring (until it get's the thickness you want). Serve on toast.

The Black-Eyed Pea's Baked Squash

Way too sweet! I found the recipe at recepizaar and it had great reviews but I found it to be really sweet. If you try it and have better results let me know.


The Black-Eyed Pea's Baked Squash


Directions

  1. Cut the tops off the squash.
  2. Cut in 3- 4 pieces.
  3. Boil in water til tender (just a few minutes).
  4. Drain and mash.
  5. Add remaining ingredients.
  6. Place in casserole dish.
  7. Cover with light layer of breadcrumbs.
  8. Bake at 350 til lightly browned (about 10- 15 minutes).

Monday, August 31, 2009

Amish Macaroni Salad

I love macaroni salad...well, there is one macaroni salad I always loved. It was at a local pizza place that is unfortunately closed and has been for quite a few years now. I know they bought it but I don't know where from. When I got the salad bar the only thing I put in it was macaroni salad and maybe a few spiced apple rings. Anyway, I've tried macaroni salad from different places and different brands. None have ever lived up to that pizza place. This one comes really close. I found it at Chocolate Moosey's blog

I've made it twice so far with a couple of changes. The first time I only used two hard boiled eggs because when I was chopping them, three looked like it would be way too many. I only used celery not green pepper and I cut back on the sugar. The second time I skipped the eggs completely, it didn't make a big difference but I think I prefer it with out the eggs. I also increased the amount of dressing by half it didn't make a big difference so I would stick with the original amount. Normally I have a problem with the sauce being absorbed into the pasta too much but I didn't have too much of a problem this time. That could be because I let the pasta cool completely or maybe because I rinsed the pasta with cool water. It did get a little thick but a couple of drops of milk stirred in before serving smoothed it back out.

Here's the recipe as found in Chocolate Moosey's blog

Amish Macaroni Salad
1/2 lb. elbow macaroni (I just guessed)
1/4 cup chopped celery or green pepper (or both)
1/4 cup grated carrots
2 Tbsp chopped white onion
3 hard-boiled eggs, chopped (yolks optional)
Paprika
1 cup mayo
2 Tbsp vinegar
1/4 cup sugar (you can cut back to 2 Tbsp if needed)
1 Tbsp yellow mustard

1. Cook macaroni as directed. Drain and let cool.
2. After the macaroni cools, mix with celery, green pepper, carrots, onion, and eggs.
3. In a small bowl, combine mayo, vinegar, sugar, and mustard. Fold into macaroni mixture. Sprinkle the top with paprika and stir a couple of times to mix it in. Cover and let chill at least 2 hours, although overnight is best.

Wednesday, August 26, 2009

Homemade Tomato Sauce

We've had an excess of tomatoes from the garden this year and with a fridge full of tomatoes I decided to try making tomato sauce before they went bad. I washed and diced the tomatoes and removed the seeds (well, most of them, I wasn't meticulous about it.) I put them in a large pot and ran my Braun handblender through it. You could use a regular blender or maybe a food processor. Then I simmered it on low for 4 or 5 hours, stirring occasionally, until it cooked down to the consistancy of canned tomato sauce. The first pass of the handblender left some chuncks so I did it again after it had cooked a little and it became much smoother. I let it cool some and packed it in freezer bags to freeze and use at a later date. All in all it was pretty easy but it did take awhile to remove the seeds so it might be easier to strain the seeds out after it has been cooked down.

above: just after it was processed with the handblender
below: after it was cooked down

Tuesday, August 11, 2009

Chicken Broccoli Noodle Bake


The recipe came from here at Recipezaar.

This was a nice recipe with a comfort food feel about it. Every thought it was okay except it needed to be saucier. It's something I might make again.
  1. Cook noodles in boiling, salted water until almost tender, drain.
  2. Mix soup and milk, add to noodles and season to taste with salt and pepper.
  3. In a 2 qt casserole, arrange 1/3 of the noodles, top with all of the broccoli.
  4. Top with 1/3 of the noodles, then with all of the chicken.
  5. Cover with remaining noodles.
  6. Mix butter with bread crumbs and sprinkle over the top.
  7. Bake uncovered at 350° until brown and bubbly, about 30 minutes.

Chicken Parmigiana With Homemade Pasta Sauce

I found the recipe here at recipezaar. I didn't care for the sauce it tasted overdone which I guess was my fault. I should have cooked it less than it called for. The recipe didn't say what to bake it at so I looked at some other recipes and cooked it at 350? (it was a while ago and I didn't write it down.) I cooked it the 40 min. that it said to but it was tough, I microwaved it for a couple of minutes the next day for lunch and it was a bit more tender so I think it should have been cooked longer in the oven.


I did not find this recipe worthy of making again. If you happen to want a frozen microwaved chicken parmigiana try Michael Angelo's it's the best! It's one of the few frozen dinner's I would actually say I like. I'm not getting paid to say it, it's really just that good.

Garlic Pepper Chicken

Tonight's supper was Garlic Pepper Chicken. It was a bit hot for some of us, including me but I don't eat a lot of spicy foods so take that into consideration if you make it. If you don't like spicy things, cut back on the cayenne pepper a little. Everyone thought it tasted great even those of us who couldn't take the heat. I will definitely be making this again. (just with a little less cayenne next time). I served it with white rice and a bag of stir fry mixed vegetables in House of Tsang classic stir fry sauce.


I found the recipe at Peacefulcooking's blog which I suggest checking out she has quite a few recipes that look great!

Recipe is copied directly from her blog.

Garlic Pepper Chicken
6 - boneless skinless chicken thighs (4 boneless skinless chicken breasts will work but it won't be as tender)
1 TBS garlic powder (one of the few times I use garlic powder)
1 tsp salt
1 tsp pepper
1/2 tsp cayenne or
red pepper
1/2 tsp onion powder
1/4 tsp paprika
1 TBS olive oil
1 TBS butter
1 cup chicken broth

Cut the chicken into tiny strips about the size of your pinkie finger. Mix together the dry ingredients and sprinkle over the chicken, mixing well so that all the chicken is evenly coated.

Heat up the butter and olive in a pan, making sure the pan gets nice and hot but don't brown your butter. You want the pan hot so that the chicken gets nicely browned when cooked. Add the chicken and brown, turning once.

Add the chicken broth and scrape up all the brown crunchies off the bottom of the pan. Turn the heat down and let the chicken broth reduce by about half. Serve over white rice. One of the best parts is when the rice absorbs some of those juices.

Edit: I didn't have onion powder so I skipped the salt and the onion powder and used an equal amount of onion salt instead.

Tuesday, August 4, 2009

Lime Chicken Tacos with homemade Tortillas

Tonight's dinner...


I found the chicken recipe at Taste Every Season
Here's the original recipe
Lime Chicken Tacos
from: BlogChef


Ingredients:

1 ½ lbs boneless skinless chicken breasts (cut into small pieces)
1/8 cup red wine vinegar
½ lime (juiced)
1 teaspoon sugar
½ teaspoon salt
½ teaspoon ground black pepper
2 green onions (chopped)
2 garlic cloves (minced)
1 teaspoon dried oregano
10 (6 inch) flour tortillas
1 tomato (diced)
¼ cup shredded lettuce
¼ cup Monterey jack cheese
¼ cup salsa
Sour cream (optional)

Make:

Step 1: Add a little oil to the pan and sauté chicken pieces in the pan for 20 minutes over medium-high heat.

Step 2: Mix together vinegar, lime juice, sugar, salt, pepper, green onions, garlic and oregano.

Step 3: Add the mixture to the pan and Simmer with chicken for another 10 minutes.

Step 4: Warm tortillas and add chicken mixture to each one evenly. Top with cheese, tomato, lettuce and salsa, sour cream.

I made a few changes to the recipe. I used 1 1/2 tbs of Realime juice instead of 1/2 a lime. I didn't have any green onion so I used about a third of a yellow onion diced finely. A red onion probably would have been good. I didn't have fresh garlic so I used a 1/2 tsp of garlic powder.

I thought the vinegar flavor was a bit strong but no one else noticed and it every one thought it was pretty good so I would make it again.

The tortilla recipe came from So Deliciously Good
Here's original recipe
1 1/2c warm water
1/4c canola oil
1/2 Tbsp salt
4 1/2-5c flour

Combine water, oil, and salt. Begin stirring in flour 1 cup at a time until your reach 4 cups. Add enough remaining flour to achieve a stiff but workable dough. Roll dough into balls. On a floured surface, roll out each ball into a 10-12" circle. Cook in a skillet sprayed with cooking spray or on a griddle for 1-2 minutes per side. Store in a plastic bag in the refrigerator. Makes about 10 tortillas.

I didn't change any of the ingredients except using vegetable oil instead of canola and I ran out of all purpose flour and had to use half a cup or so of bread flour in the dough and more for rolling them out.

There was a few thing that I changed in the making of them. After you roll the dough into balls I would suggest covering them with a damp cloth so the outside doesn't dry out and get hard. The instructions say to spray the pan with cooking spray but when I tried that the tortillas got crisp like crackers. I found a dry pan worked much better. The excess flour browns in the bottom of the pan but it's not a problem to wipe it out with a damp cloth.

It's a lot quicker to buy a pack at the store but these were pretty good. In fact, I was told that these were better than store bought.

Now for some pictures....

The dough balls


Rolled out


in the pan


finished tortillas!

Thursday, July 30, 2009

Meatloaf, potato cakes, bacon & cabbage


I don't use a recipe for the meatloaf. It's ground beef, a pkg of lipton onion soup mix, an egg or two, ketchup, and a slice or two of bread torn into little pieces. Mix well. Put in a pan ( I have a cook's essentials loaf pan that has a shallower insert with holes in the bottom to let the grease drain away from the meat. Squirt some more ketchup on top. Bake 350 for an hour or until done.

The potato cakes I make are never as good as my mom's. I think part of the reason is that I don't use enough flour and they tend to fall apart a bit. There isn't really a recipe. Take your leftover mashed potatoes and add flour (we've always used self-rising). Shape into patties and fry. We eat them with ketchup.

I found the recipe for the bacon and cabbage at girlichefs blog here I thought it was pretty good I drained a little if the grease because it was really fatty bacon and it turned out fine. It makes a change from boiled cabbage. I also left out the caraway seeds because we didn't have any.

Bad Blogger Brownies

I said in my last post I would talk about the brownies I made. That was 2 weeks ago, as I mentioned in the title I am a bad blogger. So here we go 2 weeks late.

Kittencal's Extreme Chocolate Brownies
  1. Set oven to 325 degrees F.
  2. Grease a 13 x 9-inch baking pan.
  3. In a heavy saucepan, bring butter, sugar and water to a boil, stirring constantly until the butter is melted and sugar is dissolved (about 3 minutes).
  4. Remove from the heat, with a wooden spoon, stir in 2 cups chocolate chips until melted; cool slightly, beat in vanilla.
  5. In a mixing bowl,whisk eggs, gradually add in the chocolate mixture, beating with a wooden spoon until completely mixed.
  6. Mix together flour, baking soda and salt; add to the egg/chocolate mixture; mix well to combine.
  7. Stir in the remaining chocolate chips.
  8. Spread into prepared baking pan.
  9. Bake for 35-40 minutes (don't over bake).
  10. Cut into squares.
  11. Note: If desired, chopped walnuts may be added.
36 brownies

I added all the chocolate at the beginning because I didn't read the recipe right. They had an odd taste on the first day which had faded by the 2nd day. I also halved the recipe. I would maybe try them again with and add the chocolate at the appropriate times. I also think they may have been a tiny bit overcooked.

Wednesday, July 15, 2009

Shepherd's Pie

I should probably start off with the fact that I don't like mashed potatoes. I ate them when I was young, with mayonnaise, I know that's unusual but that's how my mom ate them and she learned it from her stepfather and I have no idea why he started eating that way. Where was I? Oh yeah, I don't like mashed potatoes so it was stupid of me to try a recipe covered in mashed potatoes and think I would like it.

It wasn't all bad, I like the bottom part well enough. I think it would be good as a base for pot pie. I expect a lot of people would want to spice it up a bit but I liked it the way it was. The potatoes were a little softer that I expected, maybe I used too much milk when I made them but I think it was the egg that thinned it down more than I would have expected. I thought the egg would bind it together and thicken it a bit but I guess not.


I found the recipe at recipezaar. The link it here.

  1. If you're making your own, prepare mashed potatoes; set aside.
  2. Brown beef and onion in lg skillet over med-high heat for 5 to 6 minutes, stirring til beef crumbles and is no longer pink; drain and return to skillet.
  3. Add carrots and peas; stir in flour, 1 t salt, 1/4 t pepper,& tomato paste.
  4. Add broth, and cook, stirring constantly, 3 minutes or until slightly thickened.
  5. Spoon mixture into lightly greased 7x11” baking dish.
  6. Stir together mashed potatoes, egg, and remaining 1 t salt and 1/4 t pepper; spoon over beef mixture.
  7. Bake at 350 degrees for 25 minutes; top w/ grated cheddar and bake for an additional 5 minutes.
I also made brownies which I haven't tried yet so I'll post that later.

Saturday, July 11, 2009

Slow Roasted Whole Chicken

The recipe is here The only changes I made were I used onion salt instead of the salt and onion powder and I only had the rub on the chicken 4-5 hours instead of 8-24. The rub didn't give it much flavor, I really should have let it sit overnight. It was tender, so tender it didn't slice well. It fell apart into chunks every time I tried slicing. It was a perfectly good roast chicken but I would rather have cooked on a rotisserie or on the grill.


The last 2 pictures are what it looked like when I removed it from the pan. If you want it to look nice you might want to cook it a little less because the breast and legs came off in one piece but the wings, sides and back fell into a million pieces.

Friday, July 10, 2009

Zucchini Bread with Blueberries


I found this recipe at here at Recipezaar.

  1. Add oil, sugar, zucchini, vanilla and almond extract to beaten eggs.
  2. Sift dry ingredients together and add to batter.
  3. Gently fold in blueberries.
  4. Pour into 2 greased and floured 8x4x2" loaf pans.
  5. Bake at 350° for 1 1/4 hours until inserted toothpick comes out cleanly.
  6. Cool on rack and store in plastic wrap in refrigerator.
Makes 2 8x4 inch loaves

I did make a few alterations to the recipe. I used 2 cups of sugar instead of 2 1/2 and next time I might cut the sugar a little more. I used 2 1/2 c. of frozen blueberries instead of 2 because I didn't read the recipe properly, the 2 c. the recipe calls for should be sufficient. I also used self rising flour instead of all-purpose flour, baking powder, baking soda and salt and it worked just fine. I made 1 loaf and 8 mini loaves. The mini loaves were done in about 20 min and the regular loaf took about 40-45 min. This is a really good recipe that everyone enjoyed and if you have kids it's a great way to sneak in some vegetables!